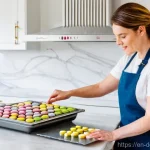
Oh, macarons! Those delicate, colorful little confections often feel like the Everest of home baking, don’t they? I totally get it.
For years, I chased that elusive ‘perfect foot’ and smooth shell, navigating sticky batter and cracked tops. It was a journey of trial and error, but truly, the joy of finally mastering them is unparalleled.
Through countless batches and a few genuinely game-changing discoveries, I’ve gathered all the insider tips and tricks that transform daunting into delicious.
We’ll explore not just the classic techniques, but also some fantastic modern twists and clever hacks that are making macaron magic accessible to everyone, no matter your kitchen experience.
If you’re ready to finally bake those beautiful, airy, chewy treats that look straight out of a Parisian patisserie, then you’re absolutely in the right place.
Let’s dive into the delicious details and get you baking those dream macarons!
The Macaron Muddle: Demystifying Common Hurdles

Oh, macarons! For the longest time, they felt like this exclusive club only expert bakers could join. I remember my first few attempts vividly – cracked shells, no feet, hollow centers… it was a saga! But honestly, every single one of those “failures” taught me something invaluable. It’s not about being a pastry chef; it’s about understanding the science and having a bit of patience. What I’ve truly learned is that many of the seemingly complex problems have surprisingly straightforward solutions once you know what to look for. Don’t let those perfect Instagram photos fool you; behind every flawless macaron is a baker who’s probably navigated the same sticky situations you are now. We’ve all been there, wondering if our oven is cursed or if the moon phase is just wrong for baking. The truth is, it’s rarely that dramatic. It’s often tiny adjustments, a slight tweak in technique, or just finding the right rhythm with your ingredients that makes all the difference. It’s a dance between precision and feel, and with a little guidance, you’ll be leading that dance in no time. Stick with it, because the reward of biting into a perfectly chewy, airy macaron that YOU made? Absolutely worth every single stumble.
The Elusive ‘Foot’: Why They Won’t Rise
Ah, the macaron ‘foot’ – that beautiful ruffled base that tells the world you’ve truly made a macaron. It’s often the first hurdle people encounter, and I swear, it used to haunt my baking dreams! I’ve found that the biggest culprits here are usually your meringue and your resting time, or ‘croutage’. If your meringue isn’t stiff enough, or if it’s over-whipped, you’re already fighting an uphill battle. It needs to be glossy and hold stiff peaks. But just as important is letting those piped shells sit out until a skin forms. This ‘croutage’ phase is critical. When you can gently touch a macaron shell without any batter sticking to your finger, you know it’s ready. This skin helps trap the steam during baking, forcing the macaron to lift and create that signature foot. I’ve tried rushing it, and believe me, it never ends well. Sometimes, even the humidity in your kitchen can play a role, making the drying time longer. So, be patient, give them space, and maybe even use a small fan if your kitchen is particularly damp. It’s like tending to a delicate garden; they need the right environment to flourish.
Hollow Shells: The Air Pocket Puzzle
There’s nothing quite as disheartening as cutting open a beautiful macaron to find it completely hollow inside. It’s a common issue, and one I wrestled with for ages. My breakthrough came when I realized it’s often a combination of oven temperature and macaronage. If your oven is too hot, the macaron will rise too quickly, creating a large air pocket that can’t be filled. Too cold, and they won’t rise enough. You need that ‘Goldilocks’ temperature – just right. Also, the macaronage – the folding of your dry ingredients into the meringue – is key. Over-macaronage deflates the meringue, leading to a thin batter that bakes hollow. Under-macaronage means the batter is too thick, preventing even air distribution. It needs to flow like lava, creating a ‘figure eight’ ribbon when lifted. It takes practice to get that perfect consistency, but once you do, it feels like magic. I even invested in an oven thermometer, and it was a game-changer. Don’t trust your oven’s dial; they can be wildly inaccurate. This small investment saved me countless batches of hollow shells and a good deal of frustration.
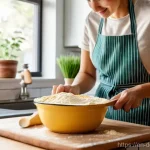
Precision is Power: Mastering Your Ingredients and Tools
When it comes to macarons, precision isn’t just a suggestion; it’s practically a commandment. This isn’t like baking cookies where a little extra flour here or a dash less sugar there won’t make a huge difference. Macarons are incredibly finicky, and every gram, every degree, truly matters. I learned this the hard way, thinking I could eyeball things or just use my old kitchen scale. Nope! This is where you really need to channel your inner scientist. It sounds intense, but trust me, once you embrace the precision, your success rate will skyrocket. It’s like learning to play a musical instrument; you need to hit the right notes, and in macaron baking, those notes are accurate measurements and the right equipment. I remember feeling a bit overwhelmed by all the meticulous steps at first, but honestly, it becomes second nature, and the payoff is so incredibly satisfying. It’s about building good habits in the kitchen that serve you well beyond just macarons.
Weighing Your Way to Perfection: The Digital Scale is Your BFF
Forget measuring cups for your dry ingredients; a digital kitchen scale is absolutely non-negotiable for macarons. I can’t stress this enough! Almond flour, powdered sugar, granulated sugar – they all need to be weighed precisely. Volume measurements can vary wildly based on how you scoop, humidity, and even the brand of ingredients. For example, a cup of almond flour can weigh differently if it’s packed versus lightly scooped. This inconsistency is a macaron killer. When I finally switched to weighing everything, it was like a lightbulb went off. My results became so much more consistent. It’s worth investing in a good quality digital scale that can measure in grams. It’s a small investment that will save you endless frustration and wasted ingredients. Think of it as your secret weapon for consistently beautiful shells. I keep mine right next to my mixing bowl now, it’s just part of the ritual.
Temperature Talk: Oven Calibrations and Humidity Checks
The oven is another massive variable that can make or break your macarons. I used to blame myself for every failure, thinking I just wasn’t good enough, but often, it was my oven playing tricks on me. As I mentioned earlier, an oven thermometer is crucial. Most home ovens fluctuate in temperature, and their internal thermostat might not be accurate. Knowing your oven’s true temperature allows you to adjust accordingly. Also, don’t underestimate humidity. On a super humid day, your macaron shells might take much longer to form that crucial skin, or they might not form it at all. I’ve even seen people use dehumidifiers in their kitchen on particularly damp days, or avoid baking macarons altogether if it’s raining heavily. It sounds extreme, but it truly makes a difference. Keeping a small note of the weather conditions when you bake can help you track patterns and understand what works best for your specific environment. It’s all about controlling as many variables as you can.
Choosing Your Path: French, Italian, or Swiss Meringue?
When you dive into the world of macarons, you’ll quickly discover there isn’t just one way to whip up that magical meringue. It’s like choosing between different dance styles – each has its own rhythm and personality. For years, I exclusively used the French method because it seemed the most straightforward, but then I started experimenting, and oh boy, what a revelation! Each meringue method offers different benefits and challenges, and understanding them can seriously up your macaron game. It’s not about one being inherently “better” than the others; it’s about finding the method that clicks with you and your baking style, and honestly, the one that gives you the most consistent results in your own kitchen. I’ve found myself gravitating towards the Italian method for certain flavors, especially when I need a bit more stability, but for a quick batch, French still holds a special place in my heart. Don’t be afraid to try them all!
The French Flair: Simple and Sweet
The French method is often considered the most traditional and, for many, the starting point. It’s the simplest in terms of technique: you just whip egg whites until foamy, gradually add granulated sugar until you have a stiff, glossy meringue, and then fold in your dry ingredients. I remember loving its simplicity when I first started, as it felt less intimidating. The resulting meringue is a bit more delicate and airy, which can translate to a slightly more delicate macaron shell. However, because it’s less stable, it’s also a bit more prone to issues like hollows or cracking if your macaronage isn’t just right. It requires a gentle hand and a keen eye. But when it works, oh, it’s beautiful! The lightness of a French method macaron is truly something special. It’s a fantastic method for learning the basics of meringue formation and macaronage without too many complex steps.
Italian Strength: Stable and Sturdy
If you’re looking for stability and a bit more forgiving nature, the Italian meringue method might be your new best friend. This method involves cooking a hot sugar syrup to a specific temperature and then slowly pouring it into whipping egg whites. The heat from the syrup essentially “cooks” the egg whites, creating a very strong, stable, and glossy meringue. I turned to this method when I was really struggling with consistency and wanted a more robust shell, especially for intricate designs or humid days. It’s a bit more involved, requiring a candy thermometer, but the results are often worth the extra effort. Italian macarons tend to be a bit chewier and have a slightly more defined ‘foot’. I’ve had great success with this method for larger batches or when I’m experimenting with new flavors and want a reliable base. It gives you a little more time to do your macaronage without the meringue deflating as quickly.
Swiss Serenity: A Gentle Alternative
The Swiss meringue method sits somewhere between French and Italian in terms of complexity and stability. For this technique, egg whites and sugar are gently heated over a double boiler until the sugar dissolves and the mixture reaches a certain temperature (around 130-140°F or 54-60°C). Then, this warm mixture is whipped until it forms a stiff, glossy meringue. I’ve found this method to produce a beautifully stable meringue, similar to Italian, but without the hot sugar syrup juggling act. It’s a fantastic choice if you want something more robust than French but find the Italian method a little too intimidating. Swiss meringue macarons tend to be very consistent, with good feet and a lovely chew. It’s a method I often recommend to bakers who are comfortable with the basics but want to elevate their game without a huge leap in technical difficulty. It’s definitely worth trying if you’re looking for a reliable, middle-ground approach to your macaron journey.
Beyond the Basics: Flavor Fusion and Creative Fills
Once you’ve nailed those perfect shells, the real fun begins: flavor! This is where you can truly let your personality shine. For a long time, I stuck to classic vanilla or chocolate, thinking they were safe bets. And they are! But oh, the world of macaron flavors is vast and absolutely thrilling. It’s like being an artist with a palette of endless colors. From bright and zesty fruit curds to rich, decadent ganaches, the fillings are what truly bring a macaron to life. This is where you get to play, experiment, and impress. I’ve found that contrasting textures and complementary flavors make for the most exciting macarons. Don’t be afraid to think outside the box; some of my favorite flavor combinations have come from just randomly pairing things I love. It’s a fantastic way to keep your baking fresh and exciting, and honestly, it’s where you can really start to develop your signature macaron style. Think about what you love to eat and how those flavors could translate into a tiny, elegant bite.
Decadent Ganaches and Buttery Delights
When I think of a truly luxurious macaron filling, ganache always comes to mind. It’s surprisingly simple to make, yet it feels incredibly decadent. From dark chocolate to white chocolate infused with various flavors, the possibilities are endless. I love a classic dark chocolate ganache, but I’ve also had amazing success with a pistachio white chocolate ganache – the nutty flavor really pops. Beyond ganache, buttercream is another fantastic base for fillings. Swiss meringue buttercream, in particular, is my go-to. It’s incredibly smooth, not too sweet, and holds its shape beautifully. You can flavor it with fruit purees, coffee, extracts, or even finely crushed cookies. One of my personal favorites is a salted caramel buttercream; the balance of sweet and salty is just divine. The key here is quality ingredients – good chocolate, real butter – it truly makes a difference in the final taste and texture of your filling. Don’t skimp here; your taste buds will thank you!
Fruity Zest and Tangy Twists
Sometimes, you need a burst of freshness to cut through the sweetness of a macaron, and that’s where fruit-based fillings shine. Lemon curd, raspberry jam, passion fruit ganache – these vibrant flavors add an exciting zing. I’ve found that a bright, tangy filling can really elevate a macaron, making it feel less heavy and more refreshing. I often make my own fruit curds; it’s surprisingly easy, and the flavor is incomparable to store-bought versions. Imagine a lemon macaron with a tart lemon curd center and a delicate lemon buttercream ring. Absolutely divine! Or a raspberry macaron with a rich dark chocolate ganache and a dollop of homemade raspberry jam in the middle. The contrast is spectacular. These fillings also add a lovely visual appeal with their natural colors. Don’t be afraid to play with different fruit combinations; sometimes the most unexpected pairings lead to the most delicious discoveries.
A Baker’s Best Friend: Understanding Oven Dynamics
I cannot overstate how much your oven plays a starring role in your macaron success story. For years, I battled with my oven, convinced it had a personal vendetta against my meringue. It was often the cause of cracked shells, hollows, or uneven baking, and I just didn’t realize it. Understanding your oven isn’t just about setting a temperature; it’s about understanding its quirks, its hot spots, and how it truly behaves. Every oven is a unique beast, and what works perfectly in one might be a disaster in another. It’s a journey of discovery, really. I’ve learned to “listen” to my oven, observing how it heats up, how consistent it is, and even how quickly it cools down. This insight has been more valuable than any recipe tweak. It’s like getting to know a new friend; you need to spend time with them to understand their habits and preferences. Once you do, you can work *with* your oven, not against it.
Hot Spots and Temperature Swings: Taming the Beast

One of the biggest lessons I learned about ovens is that they rarely heat evenly. Most home ovens have hot spots, areas where the temperature is consistently higher, and cooler spots. If you place your macaron trays in a hot spot, those shells will bake faster, possibly crack, or develop uneven feet. I found rotating my trays halfway through baking made a world of difference. It ensures more even heat distribution and helps prevent those frustrating inconsistencies. Also, oven temperature swings are real. Even if you set your oven to 300°F (150°C), it might dip to 280°F (138°C) and then overshoot to 320°F (160°C) as it tries to maintain the set temperature. That’s why an external oven thermometer is so vital. It shows you the true temperature inside, allowing you to make small adjustments to your baking time or temperature dial to compensate. It’s about being proactive rather than reactive to your oven’s temperament.
To Convection or Not to Convection: Making the Right Choice
Many modern ovens come with a convection setting, which uses a fan to circulate hot air. For some bakes, convection is fantastic, promoting even browning and faster cooking. For macarons, however, it can be a double-edged sword. I’ve tried baking with convection, and while it sometimes yields good feet, it can also lead to overly dry shells, cracked tops, or uneven baking if the airflow is too strong. Generally, for macarons, I prefer to stick to a conventional (non-convection) setting. The gentle, consistent heat without the forced air seems to be more conducive to that perfect, delicate shell. If your oven only has a convection option, you might need to adjust your baking temperature down by about 25°F (15°C) and keep a very close eye on them. It truly depends on your specific oven, so if you’re feeling adventurous, try a small test batch with convection, but otherwise, stick to conventional for macaron magic.
The Perfect ‘Foot’ Phenomenon: Secrets to Success
Let’s talk about the macaron ‘foot’ again because, let’s be honest, it’s often the ultimate tell-tale sign of a successful batch. That little ruffled edge makes them instantly recognizable and just screams “patisserie quality.” For ages, I thought the ‘foot’ was some mystical outcome, reserved only for seasoned pros. But through countless trials and a few pivotal discoveries, I’ve realized it’s entirely within reach for any home baker. It’s not about luck; it’s about understanding the key interactions happening within your delicate little batter. The science behind it is fascinating, and once you grasp it, you’ll feel a powerful sense of control over your macaron destiny. It’s truly a moment of triumph when you open that oven door and see those beautiful feet appearing. It’s the visual confirmation that all your hard work and precision have paid off, and believe me, it never gets old. That little frilly edge makes them feel so special and elegant.
Resting for the Win: The Crucial ‘Croutage’
If there’s one non-negotiable step for achieving a proper macaron foot, it’s the resting period, also known as ‘croutage’. This is when your piped macaron shells sit out at room temperature, allowing a thin skin to form on their surface. I’ve tried to rush this step, thinking “what’s five more minutes?”, and it always, always backfires. When you can gently touch the top of a shell without any batter sticking to your finger, they are ready for the oven. This skin is vital because it traps the steam generated during baking. As the steam tries to escape, the hardened top prevents it from going upwards, forcing the steam out of the base, which lifts the macaron and creates that signature ruffled foot. The drying time can vary significantly depending on the humidity in your kitchen, so don’t go by a timer alone; use the touch test! I’ve had days where it took 30 minutes and days where it took well over an hour. Patience truly is a virtue here.
Baking Temperature Balance: The Goldilocks Zone
Finding the absolute perfect baking temperature is another critical factor for encouraging those beautiful feet. It’s truly a ‘Goldilocks’ situation – not too hot, not too cold, but just right. If your oven is too hot, the macaron will rise too quickly, often cracking the top before the foot has a chance to properly form. If it’s too cool, they might not rise at all, or they’ll spread too much. I’ve found that a temperature range between 290°F and 325°F (143°C-163°C) is generally the sweet spot, but this varies significantly depending on your specific oven and whether you’re using a French, Italian, or Swiss meringue. It’s often a process of trial and error to find what works best for *your* oven. Start with a commonly recommended temperature from a reliable recipe, and then be prepared to adjust it slightly for subsequent batches based on your results. Again, that oven thermometer will be your best friend in this quest for the perfect ‘foot’.
Troubleshooting Your Macaron Mishaps: What Went Wrong?
Let’s be real: macaron baking isn’t always a straight shot to perfection. There will be batches that don’t quite hit the mark, and that’s perfectly okay! My kitchen has seen its share of macaron “fails” – from flat disks to exploded volcanoes. But here’s the silver lining: every single mishap is a learning opportunity. Instead of getting discouraged, I’ve learned to play detective, examining the shells and trying to figure out what went wrong. It’s like a culinary puzzle! This troubleshooting process is where you truly grow as a baker. It builds your intuition and understanding of the delicate balance required for these elusive treats. Don’t throw those “imperfect” macarons away, by the way – they still taste delicious in a crumble or as a topping for ice cream! Embracing the learning curve is part of the journey, and frankly, it makes the eventual successes even sweeter.
| Common Macaron Problem | Potential Causes | My Best Advice for Fixing It |
|---|---|---|
| Cracked Shells | Oven too hot, insufficient resting (croutage), over-whipped meringue, air bubbles in batter | Lower oven temp slightly, increase resting time until skin forms, fold batter gently, tap trays firmly to release air. |
| No ‘Feet’ | Insufficient resting (croutage), under-whipped meringue, oven too cool, greasy equipment | Ensure good skin forms, whip meringue to stiff peaks, check oven temp with thermometer, ensure bowls/whisks are spotless. |
| Hollow Shells | Oven too hot, under-macaronage, air bubbles, meringue too weak | Reduce oven temp, achieve proper ‘lava-like’ macaronage, tap trays firmly, ensure meringue is stiff and glossy. |
| Lumpy/Grainy Shells | Almond flour not fine enough, powdered sugar not sifted, under-macaronage | Sift almond flour and powdered sugar well, ensure proper macaronage for smooth batter. |
| Too Flat/Spreading | Over-macaronage, under-whipped meringue, batter too thin | Fold batter just until ‘lava-like’ consistency, whip meringue to stiff peaks, avoid overmixing. |
Decoding the Cracks: Why Your Shells Explode
Cracked shells are one of the most common and frustrating macaron woes, and I’ve certainly had my share! I remember staring at a tray of beautiful, perfectly piped circles, only to pull them out of the oven looking like mini volcanic eruptions. It’s usually a sign of too much internal pressure building up, which can happen for a few reasons. The most frequent culprit is an oven that’s too hot, causing the top to set too quickly before the foot can properly form. The steam then tries to escape and cracks the top. Another major factor is not allowing sufficient resting time (croutage). If that crucial skin hasn’t formed, the steam has nowhere to go but up and out through the top. Finally, over-whipped meringue can also lead to cracked shells because it’s too fragile. It’s a balancing act, and sometimes even a tiny air bubble trapped in the batter can cause a small crack. Gently tapping your baking trays after piping helps release those pesky air bubbles.
Flat and Footless: The Sagging Shell Mystery
If your macarons are coming out flat, spreading too much, and completely lacking those adorable feet, it’s almost always an issue with your macaronage or your meringue. I’ve learned that a deflated meringue is a macaron’s worst enemy. If your meringue isn’t whipped to stiff, glossy peaks, it won’t have the structure to support the macaron during baking. Think of it like building a house – if the foundation isn’t strong, the whole structure will collapse. The other major factor is over-macaronage. This is where you’ve folded your dry ingredients into your meringue for too long, deflating all that precious air you worked so hard to incorporate. The batter becomes too thin and runny, leading to flat, footless shells that spread like pancakes. It takes practice to recognize that perfect ‘lava-like’ consistency where the batter flows off your spatula in a thick ribbon and eventually blends back into itself. Trust your instincts, but also trust the visual cues!
Making Them Your Own: Personal Touches and Presentation
Once you’ve mastered the techniques and started consistently baking beautiful macaron shells, it’s time to unleash your inner artist! This is where macarons truly become *yours*. I used to just stick to basic circles and simple fillings, but then I realized the vast potential for creativity. From subtle color gradients to intricate designs, and from classic flavors to unique fusions, personalizing your macarons is incredibly rewarding. It’s like adding your signature to a piece of art. This stage of macaron making is where you can truly express yourself and create something that not only tastes amazing but also looks absolutely stunning. Think about special occasions, favorite colors, or even seasonal themes. The presentation is almost as important as the taste, especially if you’re planning to gift them or show them off on social media. It’s about creating an entire experience, not just a dessert. This is where your macarons go from being “good” to “unforgettable.”
Coloring Your World: Vibrant Hues and Natural Tones
Adding color to macarons is so much fun, and it’s an easy way to make them pop! I’ve experimented with everything from vivid gel food colorings to more natural powders. Gel food colorings are fantastic for achieving bright, saturated colors without adding too much liquid, which can mess with your batter consistency. A little goes a long way! I love playing with pastels for a classic look, but also bolder shades for a modern twist. Beyond artificial colors, you can also use natural powders like matcha for a lovely green, cocoa powder for a rich brown, or even a tiny bit of beet powder for a subtle pink. Just remember to add your coloring to the meringue *before* you do your macaronage, ensuring it’s evenly incorporated. This allows you to get a uniform color without overmixing the final batter. Think about what flavors you’re pairing them with; a subtle green shell for pistachio, or a soft yellow for lemon.
Drizzles, Dusts, and Decals: Elevating Presentation
Beyond just coloring the shells, there are so many ways to elevate the visual appeal of your macarons. A simple drizzle of melted chocolate, a dusting of edible glitter, or a sprinkle of chopped nuts can transform a plain macaron into a showstopper. I love using gold luster dust for a touch of elegance – it makes them look so luxurious! You can also pipe small designs on top of your shells with contrasting colored batter before baking, or even use stencils for more intricate patterns. Edible paints or markers can also be used after baking for truly personalized touches. Think about the occasion: for a holiday, you might add festive sprinkles; for a baby shower, tiny piped baby bottle shapes. The possibilities are endless! It’s about paying attention to those small details that make a big impact. These little adornments not only make your macarons look professional but also add a layer of thoughtfulness that guests and recipients truly appreciate.
Wrapping It Up
Well, my fellow bakers, we’ve journeyed through the sometimes-tricky but always rewarding world of macarons! I truly hope that sharing my own stumbles and triumphs has given you the confidence to tackle these delightful treats. Remember, every batch is a step closer to perfection, and the joy of creating something so beautiful and delicious with your own hands is simply unparalleled. Keep practicing, keep experimenting, and most importantly, keep having fun in the kitchen. I can’t wait to hear about your macaron successes!
Handy Tips for Your Macaron Journey
1. Always weigh your ingredients in grams; a digital kitchen scale is absolutely non-negotiable for consistent macaron results.
2. Invest in an oven thermometer! Most home ovens fluctuate, and knowing the true temperature is critical for avoiding cracked or hollow shells.
3. Patience with ‘croutage’ (resting) is key. Don’t rush this step; wait until a skin forms on your piped shells for that signature ‘foot’.
4. Master your macaronage technique. The batter should flow like lava, forming a slow ribbon, ensuring proper texture and preventing flat or hollow shells.
5. Choose your meringue method wisely. French, Italian, or Swiss – understand their differences and find the one that gives you the most stable and consistent results in your kitchen.
Key Takeaways
At the heart of macaron success lies precision in measurements, a deep understanding of your oven’s unique personality, and meticulous attention to meringue consistency and macaronage. Embrace the learning process, troubleshoot with a detective’s mindset, and don’t be afraid to experiment with flavors and designs. With practice, patience, and a bit of love, those perfect, delicate shells and delicious fillings will be yours to enjoy and share.
Frequently Asked Questions (FAQ) 📖
Q: I’ve tried so many times, but my macarons just won’t develop those beautiful “feet”! What’s the secret to getting them to rise properly?
A: Oh, the dreaded no-feet dilemma! Believe me, I’ve been there, staring sadly at flat little discs. It’s truly one of the most common frustrations, and honestly, it usually boils down to two main things: your meringue and your macaronage.
First, your meringue needs to be perfectly stiff. Not just stiff, but glossy and hold a firm peak when you pull the whisk out. If it’s too soft, it won’t have the structure to lift.
I personally found that using aged egg whites (just separating them a day or two before and letting them sit in the fridge) makes a huge difference; they whip up so much more reliably and have less moisture.
Second, and this is where many of us stumble, is the macaronage – that delicate folding process. It’s the art of deflating your meringue just enough to create a lava-like flow, but not so much that it becomes watery.
If you under-mix, your batter is too thick, and the air can’t escape, leading to no feet or even cracked tops. Over-mix, and it’s too thin, spreading out without any lift.
My personal trick? I always stop folding when the batter falls off the spatula in a thick ribbon that slowly reabsorbs into the bowl after about 10-20 seconds, forming a figure ‘8’ without breaking.
It takes practice, but once you get that ‘lava’ consistency, those feet will start appearing like magic!
Q: My macaron shells keep cracking! What am I doing wrong?
A: Ugh, cracked shells are such a heartbreak, aren’t they? You pipe them perfectly, let them rest, and then BAM – spiderweb cracks everywhere. I’ve battled this one extensively, and while your oven can play a role, it’s often a combination of factors.
The biggest culprit I’ve found is usually under-resting or trapped air. After piping, macarons need to sit out at room temperature until they form a skin – this is crucial!
When you can gently touch a shell without any batter sticking to your finger, they’re ready. This skin acts like a protective barrier, allowing the ‘feet’ to form properly instead of the top cracking from trapped steam.
On particularly humid days, this can take a good hour or even longer because the air is less able to dry the shells. My golden rule is: don’t rush the rest!
Also, right after piping, I always, always give the baking sheet a few firm taps on the counter. This helps release any trapped air bubbles that can expand and cause cracks during baking.
And if your oven runs too hot, that sudden blast of intense heat can shock the shells; try lowering the temperature just a tad and extending the baking time slightly.
It’s all about creating a stable environment for those delicate little treats!
Q: My macarons look good on the outside, but when I bite into them, they’re often hollow. How do I get that perfect chewy texture, and not just a hollow shell?
A: Oh, the hollow macaron mystery! This one used to drive me absolutely batty because they’d look so promising on the tray, only to reveal an empty void inside.
From my countless experiments, getting that full, chewy texture really comes down to a few critical elements. First, and this links back to our “feet” discussion, the macaronage has to be just right.
An over-mixed batter often bakes into hollow shells because the structure is too weak to hold its shape. But equally important is your oven temperature and baking time.
If your oven is too hot, or you bake them for too long, they can “puff up” quickly, creating an air pocket before the inside has a chance to set. I’ve found that a slightly lower and slower bake (around 285-300°F or 140-150°C for 12-15 minutes, depending on your oven) works wonders for allowing the macarons to cook through evenly.
Another tip, and this is a game-changer for many: once they’re out of the oven, let them cool completely on the baking sheet before attempting to peel them off.
This allows the centers to fully set and mature, preventing those frustrating hollows. Trust me, patience is a macaron baker’s best friend!