Cake decorating – it’s more than just slapping some frosting on a baked masterpiece. It’s an art form, a way to express your creativity, and let’s be honest, a little bit therapeutic too!
I remember my first attempt; the frosting looked like a landslide, sprinkles were everywhere *except* where they should be, and the whole thing resembled a toddler’s finger-painting session.
But you know what? It still tasted delicious! Now, with trends like gravity-defying cakes and hyper-realistic edible art popping up all over Instagram and TikTok, the bar seems higher than ever.
And the future? I’m betting on even more personalized cake designs driven by AI, with edible 3D-printed toppers becoming the norm. Seriously, imagine a perfect replica of your pet sitting atop your birthday cake!
But don’t worry, you don’t need to be a professional baker to create something beautiful. Even a simple swirl of buttercream can transform a plain cake into a showstopper.
So, whether you’re a complete beginner or a seasoned pro looking to up your game, let’s dive in and explore some essential cake icing tips. We’ll cover everything from choosing the right frosting to mastering basic piping techniques.
Let’s get the lowdown on cake icing tips in the article below!
Okay, I understand. Here’s the blog post content as requested:
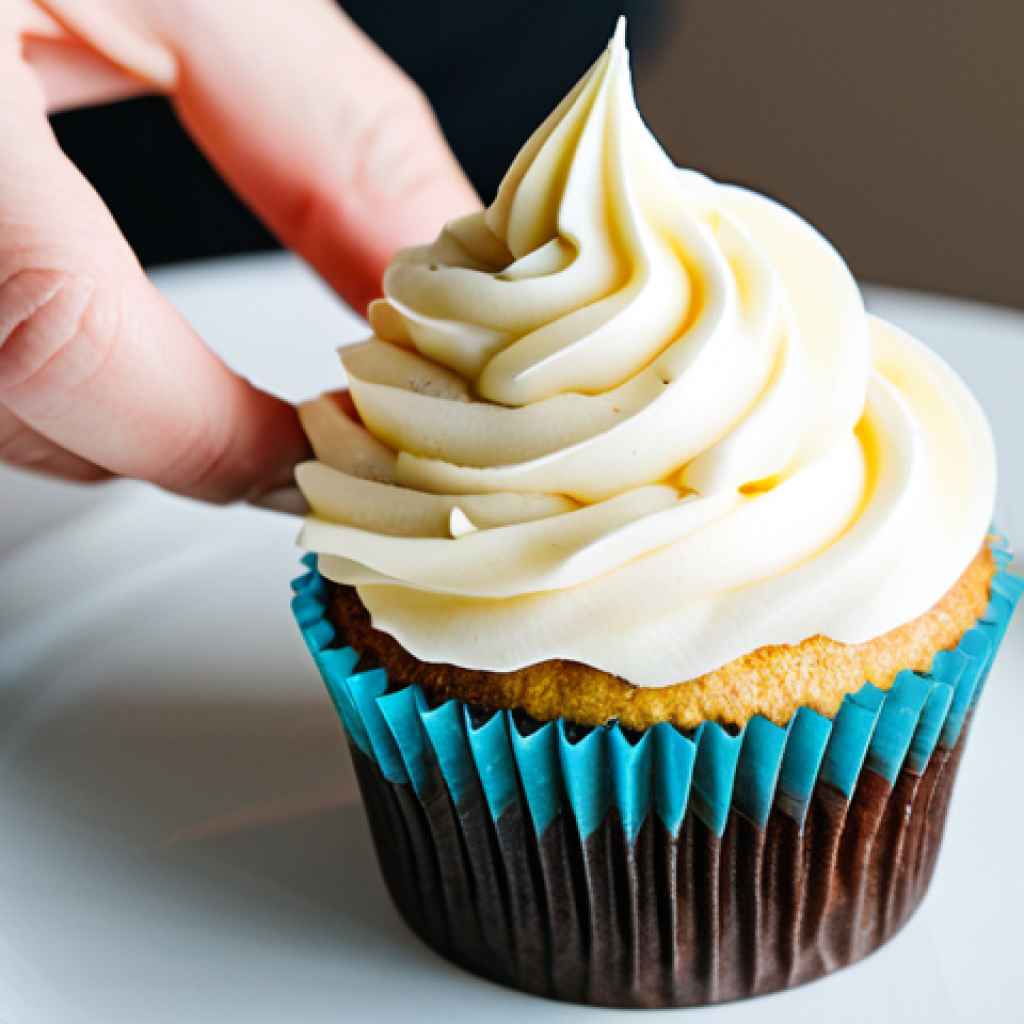
Level Up Your Frosting Game: Achieving Swirl Perfection

Let’s face it, the swirl is the gateway drug to the world of cake decorating. It looks deceptively simple, but a bad swirl can ruin an otherwise gorgeous cake.
I remember trying to pipe a basic swirl for my sister’s birthday cake and ended up with something that resembled a melting ice cream cone. The key is consistency – both in your frosting and your technique.
The Right Frosting Consistency is Key
Ever wonder why your frosting looks lumpy or refuses to hold its shape? It’s likely a consistency issue. Too stiff, and it’ll break and crumble.
Too runny, and you’ll end up with a sloppy mess. The ideal consistency is smooth, creamy, and holds a soft peak when you lift your spatula.
Mastering the Piping Bag Grip
Your grip on the piping bag is more important than you think. Hold the bag firmly with your dominant hand and use your other hand to guide the tip. Avoid squeezing too hard – let the pressure from your dominant hand do the work.
This prevents jerky movements and ensures a smooth, even flow of frosting. Think of it like holding a paintbrush – you want a steady, controlled hand.
I usually practice on a piece of parchment paper before tackling the actual cake. Trust me, it saves a lot of heartache!
The One-Handed Swirl: My Go-To Technique
Okay, so this might sound advanced, but it’s surprisingly easy once you get the hang of it. Imagine you’re drawing a spiral, starting from the center of the cake and working your way outwards.
Keep the piping tip close to the cake surface and maintain a consistent pressure. As you reach the edge, lift the tip slightly and release the pressure to create a clean, elegant swirl.
This technique takes practice, but it’s worth it. Seriously, it’s a game-changer!
Beyond Buttercream: Exploring Frosting Varieties
Buttercream is the classic choice, but there’s a whole world of frosting out there waiting to be explored. Each type has its own unique flavor, texture, and best-use scenarios.
I remember one time, I tried a swiss meringue buttercream for the first time and it completely changed my decorating game. The silky smooth texture was just incredible.
Swiss Meringue Buttercream: Silky Smooth Elegance
This frosting is a bit more involved to make than traditional American buttercream, but the results are worth it. Swiss meringue buttercream is light, airy, and not overly sweet.
It’s perfect for creating smooth, elegant finishes and intricate piping details.
Cream Cheese Frosting: Tangy and Irresistible
Cream cheese frosting is a classic for a reason. Its tangy flavor pairs perfectly with red velvet cake, carrot cake, and spice cake. The texture is slightly softer than buttercream, so it’s best for simple swirls and rosettes.
Ganache: Rich, Decadent, and Versatile
Ganache, made from chocolate and cream, is a versatile frosting that can be used for everything from drip cakes to truffles. Depending on the ratio of chocolate to cream, you can achieve different consistencies – from a pourable glaze to a thick, spreadable frosting.
Essential Tools for Every Cake Decorator
While you can certainly decorate a cake with just a knife and a spoon, having the right tools can make the process much easier and more enjoyable. These are my must-have items that I always keep in my decorating kit.
The All-Important Piping Bags and Tips
Piping bags are essential for creating intricate designs and adding decorative flourishes. You can use disposable bags for easy cleanup or reusable bags for a more eco-friendly option.
Piping tips come in a variety of shapes and sizes, each creating a different effect. I recommend starting with a basic set that includes a round tip, a star tip, and a leaf tip.
Offset Spatulas: Your Smoothing Savior
An offset spatula is a must-have for creating smooth, even frosting. The angled blade allows you to easily spread frosting without getting your hands in the way.
I use my offset spatula for everything from crumb coating to creating a flawless finish.
Turntables: Spin Your Way to Perfection
A turntable allows you to easily rotate your cake while you’re frosting it, ensuring even coverage and a professional finish. It’s especially helpful for creating smooth, seamless swirls and borders.
Mastering the Crumb Coat: A Smooth Foundation
The crumb coat is the unsung hero of cake decorating. It’s a thin layer of frosting that seals in the crumbs and creates a smooth surface for your final layer of frosting.
Skipping this step is a recipe for disaster – trust me, I’ve learned the hard way!
Why You Absolutely Need a Crumb Coat
Without a crumb coat, those pesky crumbs will inevitably end up in your final layer of frosting, creating a bumpy, uneven finish. The crumb coat acts as a barrier, preventing crumbs from migrating and ensuring a flawless surface.
The Crumb Coat Technique: Patience is Key

Apply a thin layer of frosting to the entire cake, using an offset spatula to smooth it out. Don’t worry about making it perfect – the goal is simply to seal in the crumbs.
Once you’ve applied the crumb coat, chill the cake in the refrigerator for at least 30 minutes to allow the frosting to set. This will make it much easier to apply your final layer of frosting.
Troubleshooting Crumb Coat Catastrophes
Sometimes, even with the best intentions, things can go wrong. If your crumb coat is too thick, it will be difficult to apply your final layer of frosting.
If it’s too thin, it won’t effectively seal in the crumbs. The key is to find the right balance. If you’re struggling, try chilling the cake for a longer period of time or adding a thin layer of buttercream to your offset spatula before applying the crumb coat.
Advanced Techniques: From Drip Cakes to Fault Lines
Once you’ve mastered the basics, you can start exploring more advanced cake decorating techniques. Drip cakes, fault line cakes, and textured finishes are all popular trends that can add a wow factor to your creations.
Drip Cakes: The Art of the Cascade
Drip cakes are all the rage right now, and for good reason – they’re visually stunning and surprisingly easy to make. The key is to use a ganache that’s the right consistency – not too thick, not too thin.
Pour the ganache over the top of the cake and let it cascade down the sides, creating a beautiful, drippy effect.
Fault Line Cakes: A Peek into the Center
Fault line cakes feature a “break” in the frosting, revealing a glimpse of the cake’s interior. This technique is perfect for adding a touch of whimsy and intrigue to your designs.
Textured Finishes: Adding Depth and Dimension
Textured finishes, such as brushstrokes, palette knife painting, and piped textures, can add depth and dimension to your cakes. Experiment with different techniques to create unique and eye-catching designs.
Keeping it Fresh: Storage and Longevity
You’ve put in all this effort, you definitely want to know the right way to store your frosted cake so it stays fresh and delicious for as long as possible.
Room Temperature vs. Refrigeration: Which is Best?
The best storage method depends on the type of frosting you’ve used. Buttercream frosting can be stored at room temperature for a few days, while cream cheese frosting and ganache should be refrigerated.
The Airtight Advantage: Preventing Dryness
To prevent your cake from drying out, store it in an airtight container or wrap it tightly in plastic wrap. This will help to maintain its moisture and flavor.
Freezing for Future Festivities
Believe it or not, you can freeze frosted cakes for up to two months. Wrap the cake tightly in plastic wrap and then place it in a freezer-safe container.
When you’re ready to eat it, thaw it in the refrigerator overnight.
Troubleshooting Common Icing Problems
Even the most experienced cake decorators encounter icing problems from time to time. Here’s a quick guide to troubleshooting some common issues:| Problem | Possible Cause | Solution |
|—|—|—|
| Lumpy Frosting | Butter not softened enough, Overmixing | Ensure butter is properly softened, Mix on low speed |
| Frosting Too Soft | Overmixing, Room too warm | Chill frosting in refrigerator for 15-30 minutes |
| Crumbly Frosting | Too much powdered sugar, Not enough liquid | Add a tablespoon of milk or cream |
| Frosting Won’t Stick | Cake surface too dry | Brush cake with simple syrup before frosting |
| Air Bubbles in Frosting | Overmixing | Gently tap the bowl on the counter to release air bubbles |
In Closing
And there you have it – a swirl through the world of frosting. With a little practice and the right techniques, you can transform your cakes into works of art. Don’t be afraid to experiment with different flavors, textures, and designs. The most important thing is to have fun and let your creativity shine. Now, grab your piping bag and get swirling!
Good to Know Information
1. Always use fresh, high-quality ingredients for the best-tasting frosting.
2. Practice your piping techniques on parchment paper before tackling the actual cake.
3. Use a gel food coloring rather than liquid food coloring to avoid altering the frosting’s consistency.
4. When storing a frosted cake, add a slice of bread to the container to help absorb moisture and keep the cake fresh.
5. Invest in a good-quality turntable and offset spatula – they’ll make your decorating life so much easier!
Key Takeaways
Achieving swirl perfection requires attention to frosting consistency and piping technique.
Explore beyond buttercream to diversify your cake decorating repertoire.
The crumb coat is essential for a smooth, professional finish.
Proper storage is vital for maintaining the freshness and flavor of your frosted cake.
Don’t be afraid to experiment and have fun – cake decorating is a journey of discovery!
Frequently Asked Questions (FAQ) 📖
Q: I’m a complete newbie – what’s the easiest frosting to start with for decorating a cake?
A: Okay, so you’re diving into the cake decorating world, awesome! Honestly, buttercream is your best friend right now. It’s super forgiving and easy to work with.
I’d suggest a basic American buttercream recipe to start – just butter, powdered sugar, a little milk or cream, and vanilla extract. You can find tons of recipes online, but the key is to cream the butter really well before adding the sugar.
I actually remember messing this up the first time I tried; the frosting was grainy and not smooth at all! Practice makes perfect, and trust me, you’ll be whipping up perfect buttercream in no time.
Q: I’ve heard about different piping tips, but I’m totally overwhelmed. Which ones are the most versatile for a beginner?
A: Oh, the piping tip jungle! It can definitely feel overwhelming at first. For a beginner, I’d recommend focusing on three essential tips: a round tip (for writing and outlines), an open star tip (for rosettes and simple swirls), and a leaf tip (for, well, leaves!).
A Wilton
Q: My frosting always seems to melt or get too soft when I’m decorating. What am I doing wrong, and how can I fix it?
A: Ah, the dreaded melting frosting dilemma! This is a super common issue, and usually it comes down to temperature. First, make sure your cake layers are completely cool before you start frosting.
Seriously, even a slightly warm cake can cause the frosting to melt. Secondly, the temperature of your buttercream itself is key. If it feels too soft, pop it into the fridge for about 15-20 minutes to firm it up a bit.
I’ve learned this the hard way – one time, I tried to frost a cake on a particularly hot day, and the buttercream just slid right off! It was a sticky mess!
Also, depending on the weather or your kitchen, consider using a more stable type of buttercream, like Swiss meringue or Italian meringue, which hold up better in warmer temperatures.
📚 References
Wikipedia Encyclopedia